English 

Views: 354 Author: Site Editor Publish Time: 2011-03-23 Origin: Site
How to Embroider a Cap ?
Hats & caps… just one of the many clothing articles we as embroiderers get to have fun and be creative with. Caps are a staple of the embroidery business. According to a survey several years ago, over 80% of profit-making embroiders do caps. That being said, it makes sense to take the time to learn how to sew on them
Choosing Your Hat for Embroidery:
Ball caps are all about variety. You look at a cap catalog or website and there are hundreds if not thousands of choices. You have your choice of color combinations, material, the height of the crown, type of bill, back closures and the list goes on and on. While there are hundreds of different hat styles and manufacturers out there, most hats generally fall under 3 main categories:

1. OPF (One piece front) hats:
These are usually categorized as “trucker/farmer” hats. These hats have one piece of foam laminated backing (gives the hat structure) and the rest of the hat is more of a mesh material. OPF hats are usually pretty easy to hoop and embroider because of their laminated backing and there is no center seam in the hat.

2. Varsity / Collegiate hats:
These hats tend to fit a little closer to the head, due to the fact they do not have any laminated backing (structure) on the front of the panel. Because of this, these hats do have a tendency to move a little bit, which is why making sure it’s properly hooped is so important.
 3. Sports Cap: This is generally the most popular style of hat, especially for embroidery. This hat does have a center seam down the middle of the front panel (Aka: the Bermuda triangle of embroidery, you generally tend to lose stitches in the center seam) and a laminated backing giving it structure. |
The most common area embroidered is obviously the front of caps. Even the most basic cap frames are designed to do the fronts of caps. Most commercial embroidery machines today utilize wide angle cap frames which are designed to go most of the way around the cap, typically 270º of rotation.
Front & Center:
The front of a cap is the most common placement and probably the easiest placement to sew. As mentioned earlier, all cap frames are designed to embroider the front of the cap if nothing else. The main variance with ball caps is whether or not the front panels are structured or not. Structured caps typically have a fused buckram backing inside making the crown of the cap stand up. Unstructured (varsity & collegiate style hats) do not have this and tend to be more floppy.
For unstructured caps, it’s important to use cap backing (stabilizer). Cap backing is a really stiff and heavy tear away. For unstructured caps, it provides not only stabilization for the fabric but helps hold the shape of the cap while it’s being embroidered. Structured caps don’t need the backing as the fused buckram acts as the stabilizer.
 |  |
Side to Side:
For side placements, the back clip must be utilized. The main purpose of the back clip(s) is for side placements on caps. Wide angle cap frames vary from brand to brand. The main difference in these frames is the back clips. Some have one large clip for the back. Some have one on each side of the back. Most brands use multiple clips that look a lot like binder clips from an office supply store. Whatever the type of clip, it’s important to use them when sewing side placements on caps… Otherwise, the design will look like it’s running downhill.
While cap backing may be optional for front placements on certain types of caps, it’s a necessity for side placements. There is no fused buckram or anything of the sort on the sides of caps and therefore must be stabilized. For normal twill caps, a single piece of cap backing will work just fine.
The same goes for a mesh cap. Yes, it’s possible to sew on mesh caps with the proper stabilization. The backing provides the necessary material to hold the stitches together. For this reason, a cutaway stabilizer is recommended.
It can sometimes be tricky to get the backing to stay in place on the side while the cap is being hooped. The tendency would be to tuck it under the frame. While that holds it in place while it’s on the framing device, the backing will fall right out afterward as it not being held in place by the frame. The cap has to hooped with the backing on top of the frame.
One way to overcome this hassle is by placing a piece of double-sided tape (such as carpet tape found at most home improvement stores) on the side of the cap frame. Then peel the backing paper off and stick the cap backing onto the tape. This will secure the hold the backing in place long enough to get the cap hooped but pulls off easily from the frame.
Hooping your Hat:
In order to start embroidering on your hats & caps, they will need to be hooped properly. Whether you’re new to embroidery or an experienced embroiderer I’m sure we can all agree that hooping caps can be difficult, especially without proper instructions. I frequently see people post about their failed embroidery hat projects, asking what went wrong and often end up blaming their machines. Little do they know that if their cap isn’t hooped properly, it can lead to disastrous results. As with any embroidery project, if your hooping isn’t clean your embroidery won’t be either.
Let’s go over a hooping technique for caps/hats that the Embroidery Legacy used on our caps while running 2 of North Americas largest embroidery production factories in the 1990s. Simply follow these steps to ensure your cap will be hooped properly. Before we get started, it’s important to understand that you will need a cap hooping accessory. This accessory consists of 3 main components:
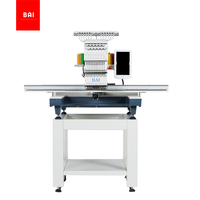
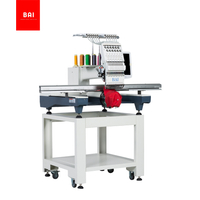
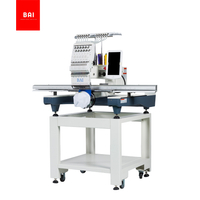
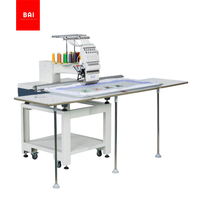
 1. Cap Driver: The driver, which will fit right over top of the arm of the machine. |  2. Cap Frame: The cap frame is what your hat will be attached to. |  3. Cap Station: The cap station is used to attach the cap frame for more accurate hooping. |
A hat needs to be hooped properly to run successfully on a machine. But what is equally or even more important, is that the design is digitized specifically knowing that it will be embroidered on a curved surface.
Attention please: One of the most important things to remember when hooping your cap is that the center seam of the hat lines up to the center mark on your cap frame.
 Step 1 Step one is making sure our cap frame is properly secured to the jig. You will know it’s secure because it will click into place and will have no, to hardly any, wiggle room. |  Step 2 Now we want to get the cap frame into position for our hat. We’ll start by moving the peak mount out of position as well as the band. |  Step 3 Now that the cap station is ready for hooping we need to prepare the hat itself. We’ll start by moving the band on the inside of the hat out of way, as the band will be placed underneath of the plate on the cap station. (Be sure to try and align the red line to the center seam). |  Step 4 Now that our hat is on the cap frame and the band of our hat is securely in place, we’re going to take the cap frame band/strap and secure it so the teeth of the band lines up to the base of our cap. Once in position, push the strap down to lock it. Be sure there is no excess space where the peak of the hat meets the crown. |  Step 5 Now for our final step, we’re going to start by placing material over the peak of the hat to avoid unwanted markings on our cap (hats are generally one of the hardest materials to get hoop burn out of). Once the material is in place simply engage the peak mount to ensure the peak of the hat won’t hit the machine while it’s embroidering. Your hat is now successfully hooped. |
Conclusion:
Embroidering on hats can be both fun and profitable. Now there are a number of hats out there, so make sure you know which of the 3 your customer (or you) are interested in before starting & making an order. With all the variety of caps out there, it’s good to be able to provide the same variety for placements. Just be sure to follow the tips outlined above. Finally, hooping a cap may be difficult… but using the proper hooping accessories will make a world of difference! Follow the steps above & you shouldn’t have any problem.
Visual Learner ?
If you’re more of a visual learner, here’s a video we made for the whole process.
Cap Teaching Video Link: